How Visere Captura Works. A Step by Step Journey.
Visere Captura Product Photography Software is a comprehensive solution designed to streamline image capture and management for eCommerce, product catalogs, and digital marketing. It combines powerful editing tools, background removal, precise camera control, and turntable automation into a single, user-friendly platform, eliminating the need for multiple software applications.
By connecting a compatible camera to a computer via USB, users gain direct control over camera settings, exposure, white balance, and focus, ensuring consistent and high-quality results. The intuitive interface allows for effortless image capture, review, and adjustment, making the process efficient and accessible even for those with minimal photography experience.
When paired with a Pictomic turntable, Visere Captura automates 360° product photography, capturing multiple angles in a seamless workflow. Users can specify the number of frames per rotation (e.g., 72 images for 5-degree increments) to generate smooth, interactive 360° spins. The integrated focus stacking feature ensures that every image remains sharp and detailed, even for complex products with varying depths.
With its advanced automation and precision control, Visere Captura empowers businesses to produce studio-quality product images quickly and efficiently, enhancing the visual appeal of online listings and marketing materials.

Step I
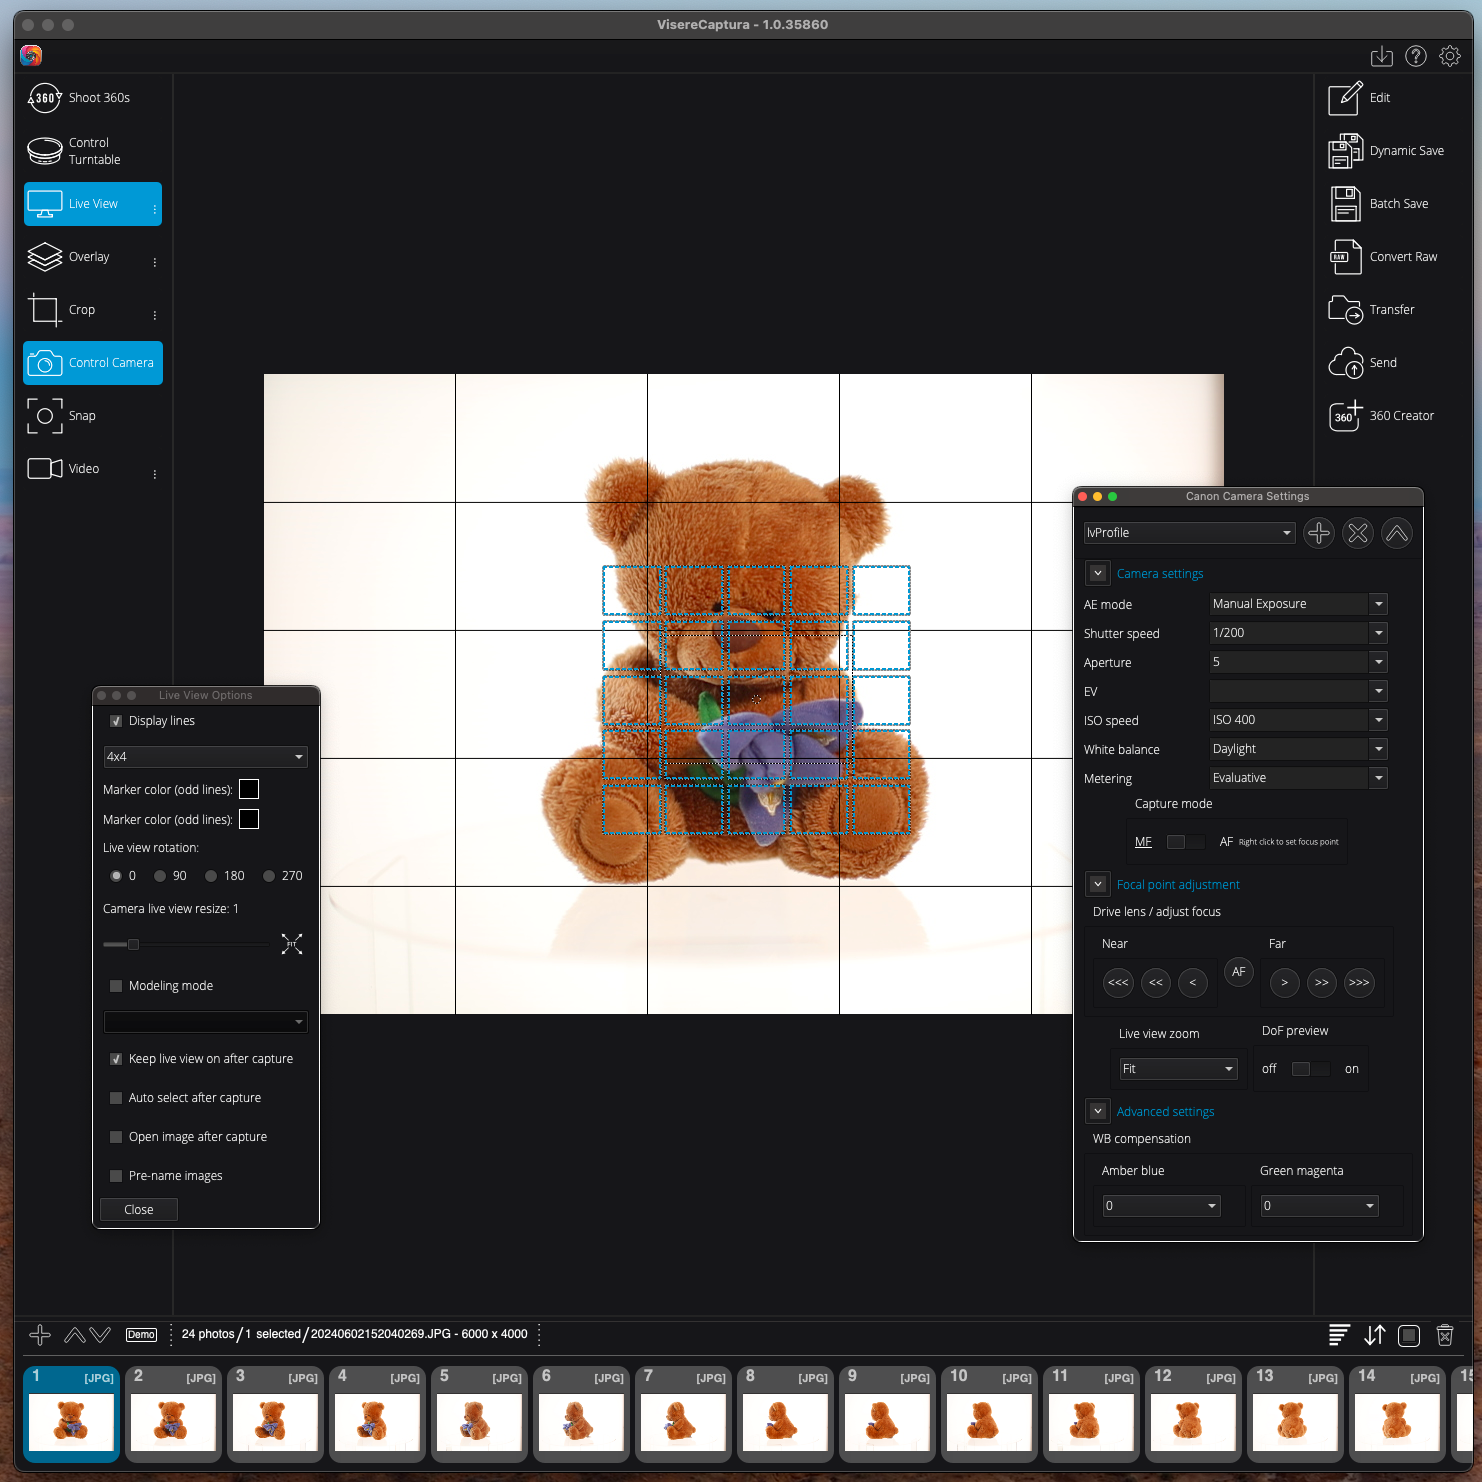
Enable Live View
Users can access real-time camera views by clicking the 'Live View' button within the program. This feature allows users to position their objects in front of the camera and adjust them to their preferred shooting angle or location.
STEP II
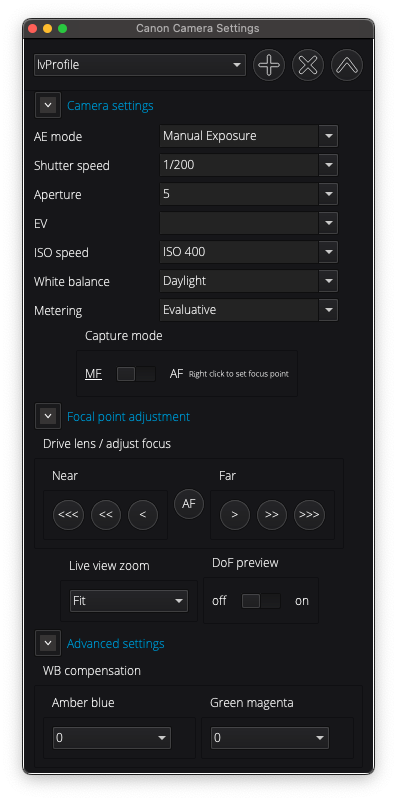
Compose Image
In Visere Captura, users can fine-tune camera settings through simple mouse clicks to achieve optimal exposure. These adjustments encompass exposure elements like Aperture, Shutter Speed, White Balance, ISO, and more. Additionally, users can set focal points with ease. As adjustments are made, the 'Live View' feature dynamically simulates image exposure in real time, enabling users to preview exposure levels before capturing the image (*requires a camera with exposure simulation capability). Users can also save multiple 'Camera Settings Profiles' for future use, ensuring consistency in imaging.

STEP III
Pre Crop
Once exposure adjustments are completed, users can delineate a 'Pre-Crop' around their subject using Visere Captura. This cropping can be done in free-form, at a custom ratio (e.g., 8 x 5), or as a perfect square. Additionally, users have the option to save multiple 'Crop Profiles' within the software, which are stored for future use to ensure imaging consistency.
STEP IV
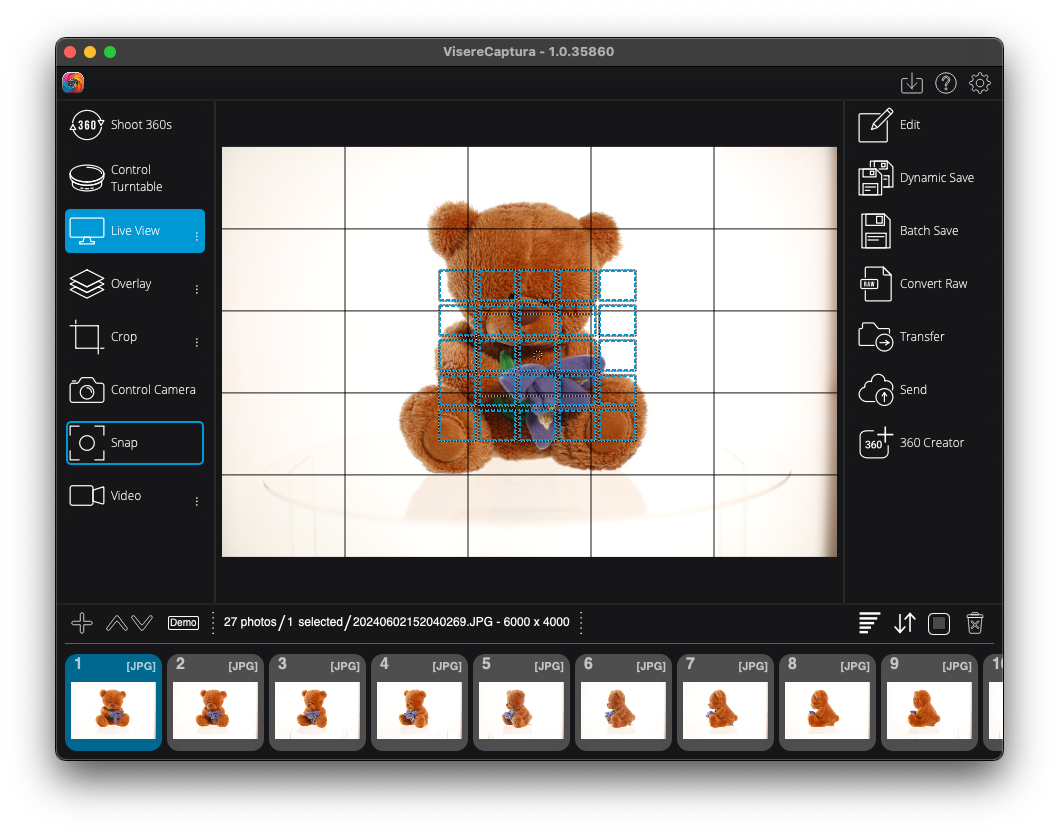
Capture
When capturing a product image, click the ‘Snap’ button in Visere Captura. The image uploads instantly for viewing, editing, processing, and output. Capture additional views easily, retaining camera settings and crop markers. For focus stacking, use the optional Focus Stacking plugin to automate the process. Enhance efficiency with pre-defined edits, processing, and output applied immediately after capture.
STEP V
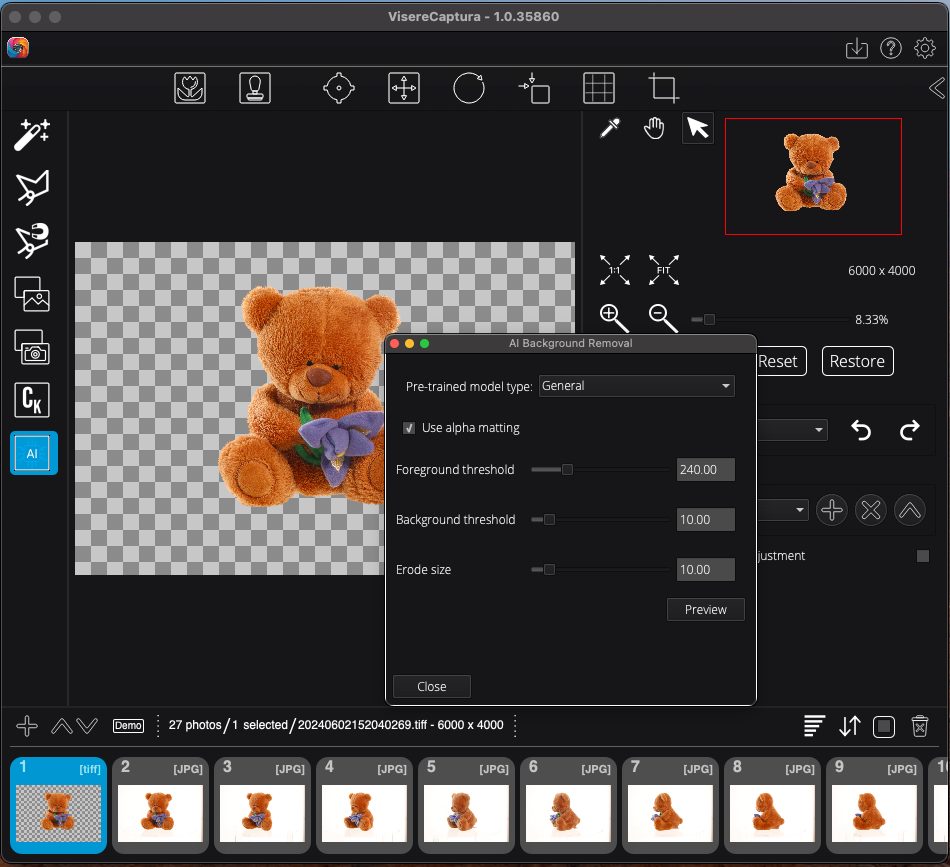
Editing & Background Removal
After capturing images, enhance them using Visere Captura's comprehensive editing suite. This includes tools for color correction, image enhancement, and a wide range of background removal tools, including our newest artificial intelligent background removal tool, Background Removal Pro. Edits can be applied individually or in batches. Users can also create and save 'Editing Profiles' for quick application to other images or during capture, streamlining the workflow.
STEP VI
Image Output
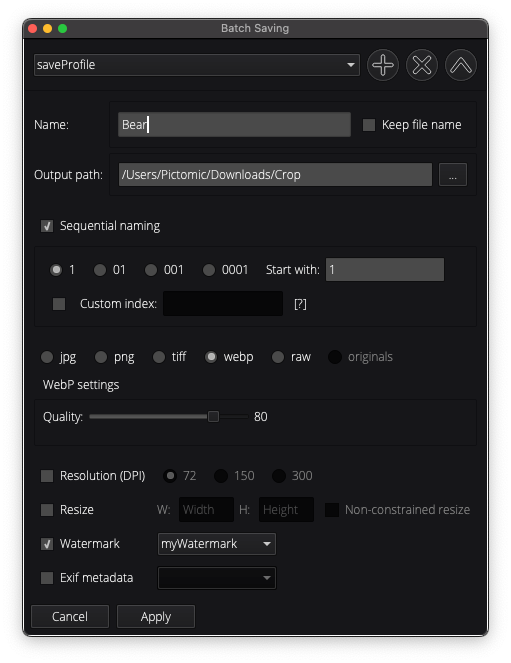
The final step involves outputting the images. Visere Captura allows for batch editing and automated output. Users can specify save locations (local, networked, cloud, FTP), define naming conventions, choose formats (WEBP, JPG, PNG, TIFF, RAW), set resolution (DPI), adjust size (pixels), and add watermarks. Multiple image sets with different properties can be outputted for various needs. Batch saving is executed with one click, and 'Save Profiles' can be saved for future use.

Our 360 Product Photography and Video Software suite offers comprehensive automation tools with integrated turntable controls for capturing still images, 360 spins, and 360 videos. Enhance your workflow with our Focus Stacking Plugin for watermark-free focus stacking photography.
Visere Captura gives photographers, eCommerce sellers, and creative teams complete control of their studio workflow. It combines:
- Advanced camera control
- Photography turntable control
- Macro-Rail control
- Automated capture
- Focus stacking
- Batch processing
- AI background removal
With our Maintenance option, you can keep your Visere Captura license up to date at all times. Maintenance upgrades your software to the latest version and provides one year of upgrades and support, ensuring you always have access to new features, performance improvements, and expert help when you need it.
For those looking to get the most out of their studio setup, we also offer a 90-minute hands-on Training session with our experts. This session is designed to help you master the Visere Captura workflow, learn best practices, and apply professional techniques to elevate the quality of your product photography and 360° visuals.
Together, these tools and services make the Visere Captura 360 product photography and video software collection a complete solution for studios that want efficiency, consistency, and professional-grade results.
-
Visere Captura 360 Product Photography & Video Software
Regular price $359.10 USDRegular priceUnit price per$399.00 USDSale price $359.10 USDSale -
Focus Stacking Plugin for Macro Photography
Regular price $149.00 USDRegular priceUnit price per -
Upgrade Shutter Stream to Visere Captura
Regular price $359.10 USDRegular priceUnit price per$399.00 USDSale price $359.10 USDSale -
Visere Captura Training
Regular price $199.00 USDRegular priceUnit price per