Free Photography Turntable Controller
The Pictomic Photography Turntable Controller is a free, standalone application designed to provide seamless control over Pictomic turntables. It offers precision movement, automated rotation, and customizable control settings, making it an essential tool for users who need efficient 360° product photography and image capture.
One of the key benefits of the Pictomic Turntable Controller is that it requires no registration or activation, ensuring immediate access without the hassle of licensing or account setup. While it comes bundled with Visere Captura, it remains independent, meaning users can operate the turntable without needing to register or activate Visere Captura. This flexibility allows photographers, businesses, and studios to incorporate turntable automation into their workflow without additional steps or software restrictions.
With its intuitive interface, the Turntable Controller simplifies precise angle adjustments, step rotations, shutter release, and full automation, making it a powerful addition for anyone looking to enhance their 360° product photography process with ease and efficiency.

Step I
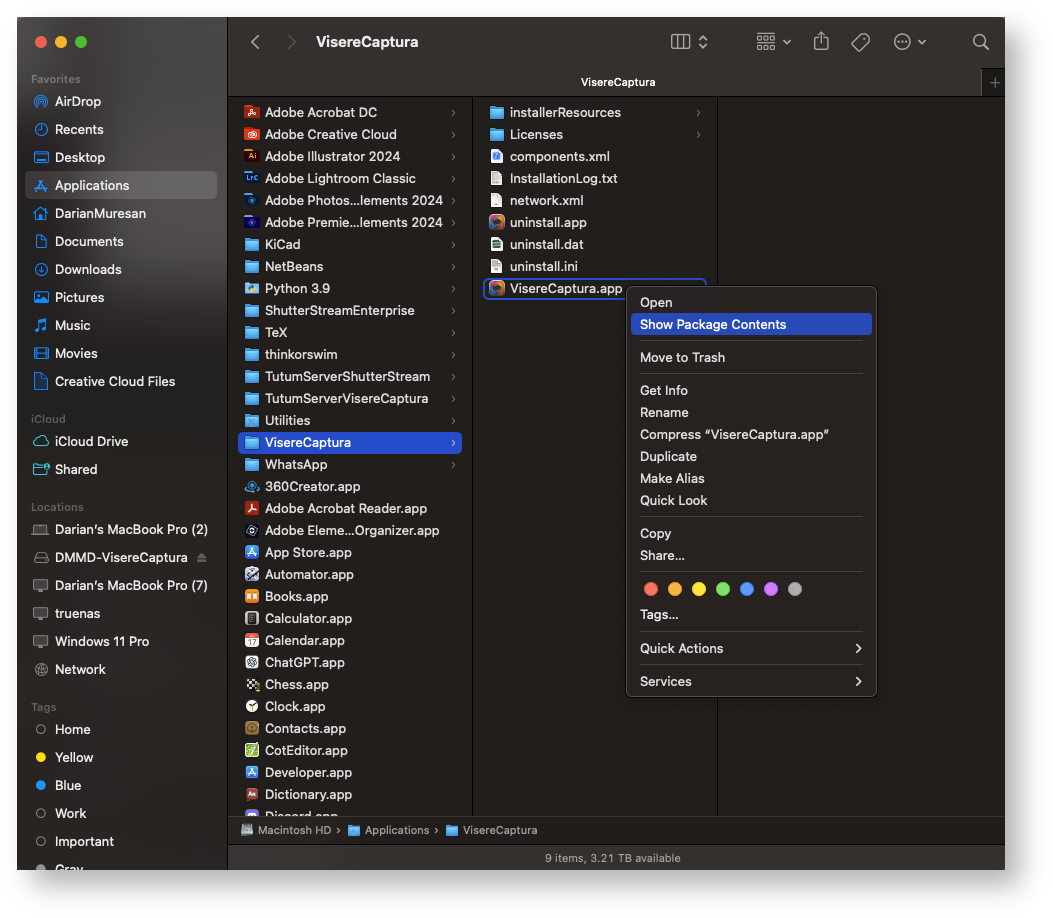
Open Package Contents
Download and install the latest version of Visere Captura from the Release Notes, ensuring that you install Version 2.0 or higher. After installation, do not launch Visere Captura.
• For Mac: Right-click on Visere Captura and select “Show Package Contents”.
• For Windows: Navigate to the installation directory using File Explorer.
STEP II
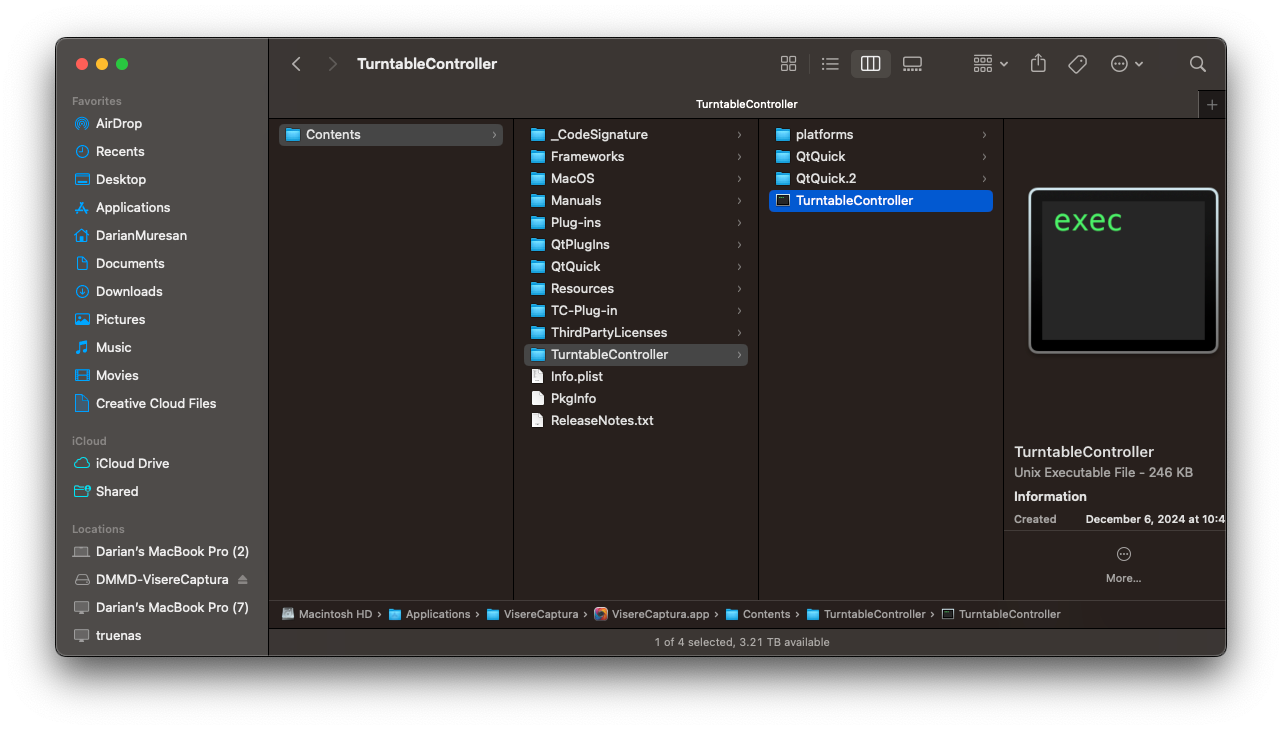
Turntable Controller
• For Mac: Navigate to Contents/TurntableController within the Visere Captura package, where you will find the free Pictomic Turntable Controller application.
• For Windows: Simply browse to the installation directory, where the Turntable Controller application is located. You can launch it directly from there to control your Pictomic or Iconasys turntable.
STEP III
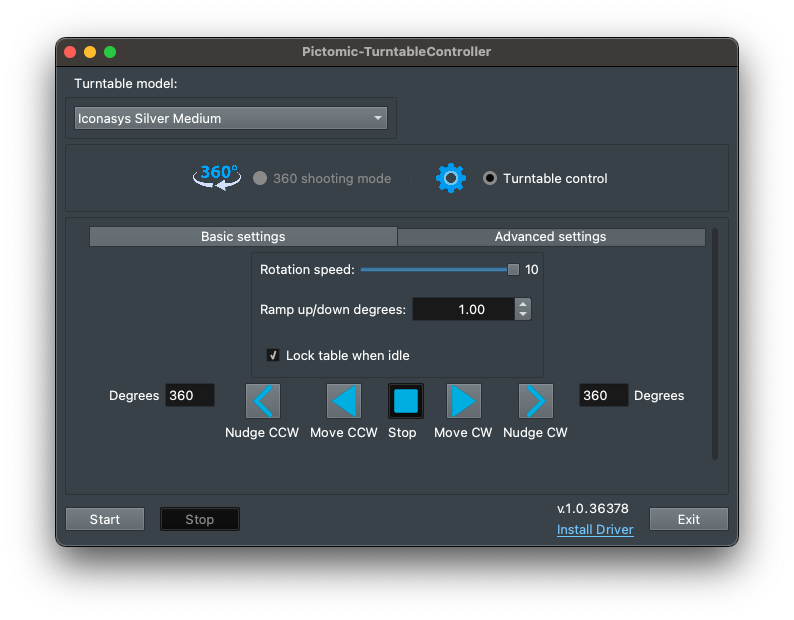
Start the Turntable Controller
1. Select your turntable model from the available options in the Turntable Controller application.
2. Set the rotational speed, 10 is fastest.
3. Use the Move (continuous rotation) and Nudge (rotate a number of degrees) buttons to control the turntable’s rotation:
STEP IV
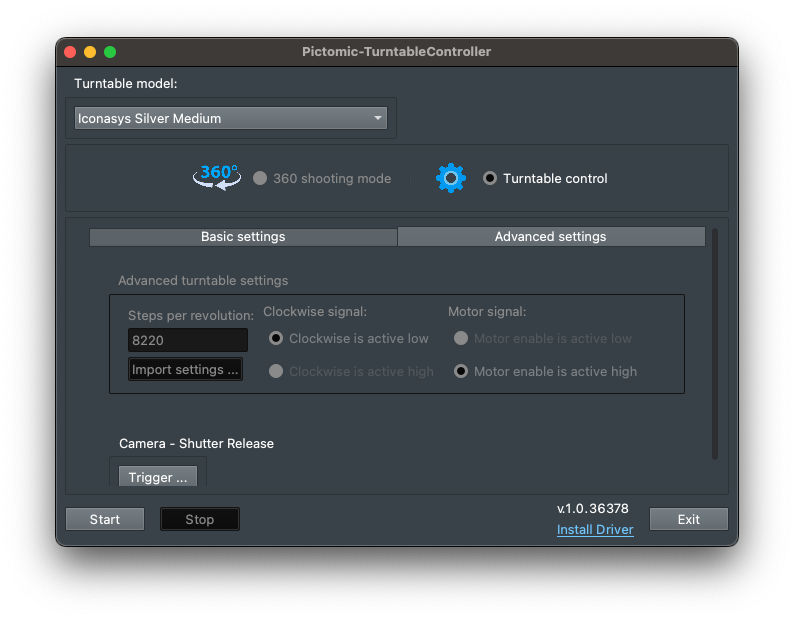
Advanced Settings
1. Setting a custom number of steps – This allows you to define how many steps the turntable will take per full rotation, enabling precise control over image capture angles.
2. Manually triggering the shutter release – If your camera is connected to the turntable via a shutter release cable, you can trigger the camera’s shutter directly from the turntable controller, ensuring synchronized image capture with each step of the rotation.
STEP V
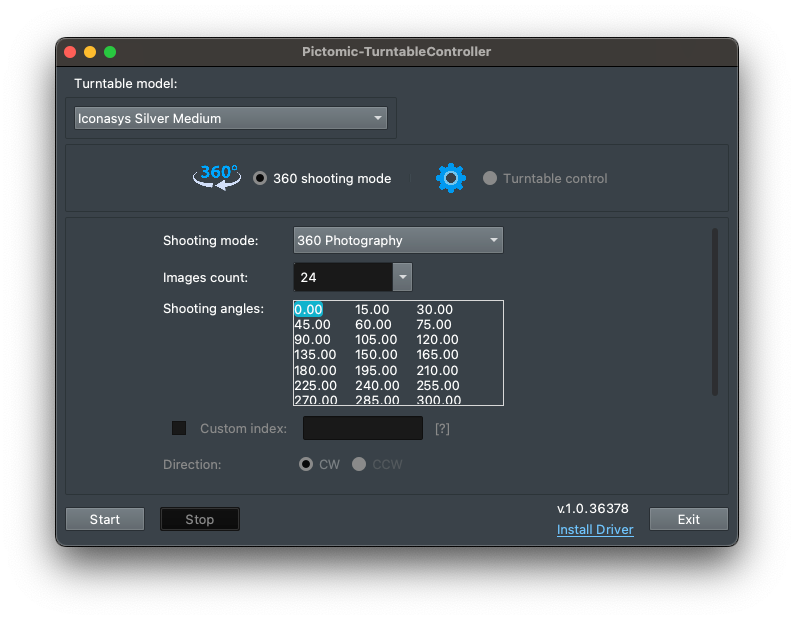
360 Shooting
Finally, in the "360 shooting mode" you can set the number of pictures you want to shoot (via shutter release) and the turntable will turn→stop→shutter release until the number of pictures are captured over a full 360.

Our 360 Product Photography and Video Software suite offers comprehensive automation tools with integrated turntable controls for capturing still images, 360 spins, and 360 videos. Enhance your workflow with our Focus Stacking Plugin for watermark-free focus stacking photography.
Visere Captura gives photographers, eCommerce sellers, and creative teams complete control of their studio workflow. It combines:
- Advanced camera control
- Photography turntable control
- Macro-Rail control
- Automated capture
- Focus stacking
- Batch processing
- AI background removal
With our Maintenance option, you can keep your Visere Captura license up to date at all times. Maintenance upgrades your software to the latest version and provides one year of upgrades and support, ensuring you always have access to new features, performance improvements, and expert help when you need it.
For those looking to get the most out of their studio setup, we also offer a 90-minute hands-on Training session with our experts. This session is designed to help you master the Visere Captura workflow, learn best practices, and apply professional techniques to elevate the quality of your product photography and 360° visuals.
Together, these tools and services make the Visere Captura 360 product photography and video software collection a complete solution for studios that want efficiency, consistency, and professional-grade results.
-
Visere Captura 360 Product Photography & Video Software
Regular price $359.10 USDRegular priceUnit price per$399.00 USDSale price $359.10 USDSale -
Focus Stacking Plugin for Macro Photography
Regular price $149.00 USDRegular priceUnit price per -
Upgrade Shutter Stream to Visere Captura
Regular price $359.10 USDRegular priceUnit price per$399.00 USDSale price $359.10 USDSale -
Visere Captura Training
Regular price $199.00 USDRegular priceUnit price per